There is nothing more frustrating than exporting the image, uploading it to the internet, or placing it in a publication and finding out that it doesn’t have a transparent background. Yaay!
To avoid this from happening in the future, I’ve decided to write this tutorial. Here you will find out how to create a transparent background in Affinity Designer if you’ve already made your designs and want to export your image with transparency.
In the second part of this tutorial, you will find out how to apply transparent background to your project right from the beginning.
These Are The Steps You Need To Take To Create Transparent Background In Affinity Designer:
- Step 1: Navigate to the Document Setup
- Step 2: Select The Transparency Option In The Color Tab
- Step 3: Export Your Work
For more details, follow the full step-by-step tutorial below.
How To Make Transparent Background In Affinity Designer
Exporting Current Image In Affinity Designer With Transparent Background
Step 1: Navigate to the Document Setup
Go to: File > Document Setup or use the shortcut Ctrl+Shift+P (Shift+Cmd+P on Mac), and a pop-up window will open.
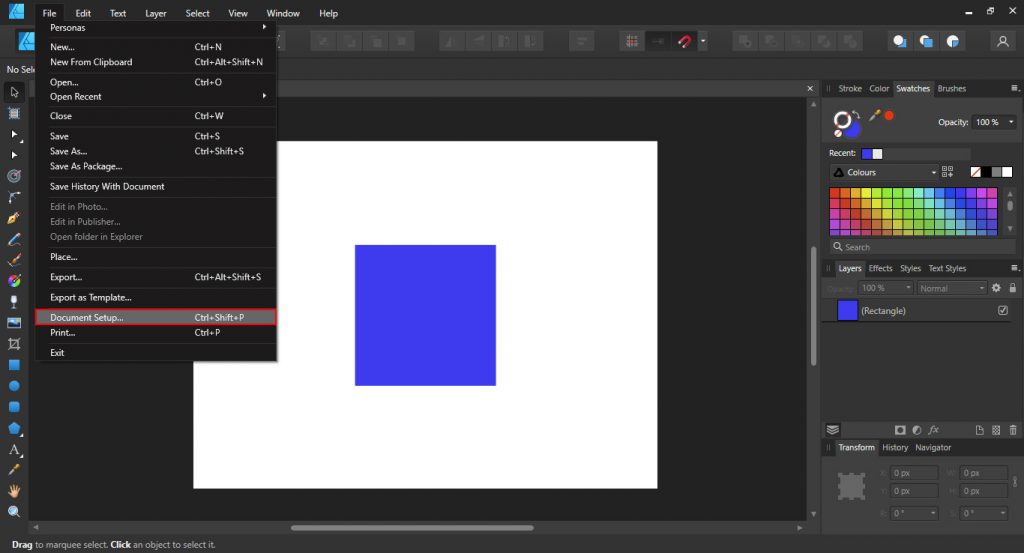
Suppose you have the Selection Tool activated, and you don’t have any object selected. In that case, you can access the Document Setup in the top Toolbar. Click somewhere outside the Artboard to exclude the selection if you have an object picked.
As you can see, you can access the Document Setting in a few different ways. Now, let’s see where you can set the transparent background for your image.
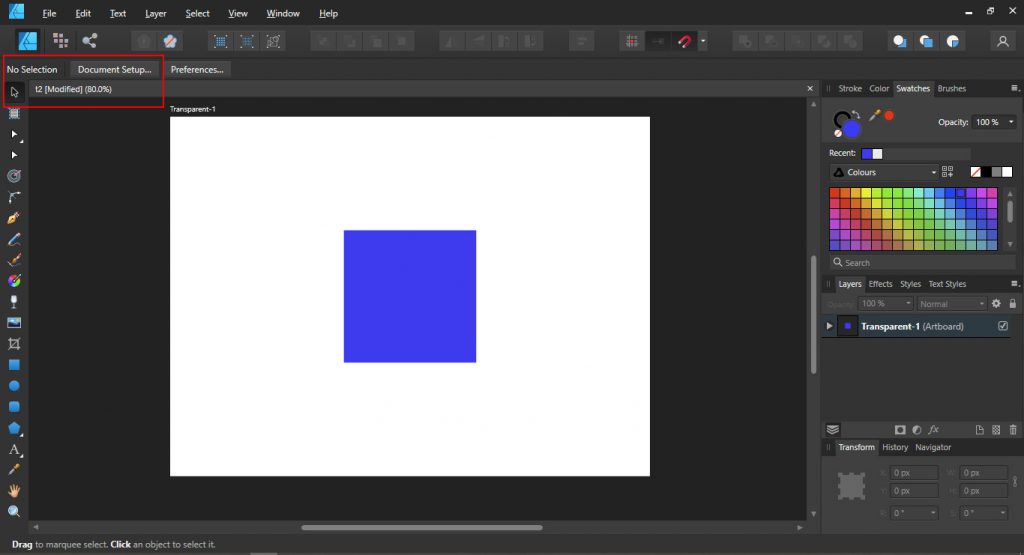
Step 2: Select The Transparency Option In The Color Tab
Once the Document Setting window opens, navigate to the Color Tab and check Transparent background.
Click OK, and you have set the transparent background.

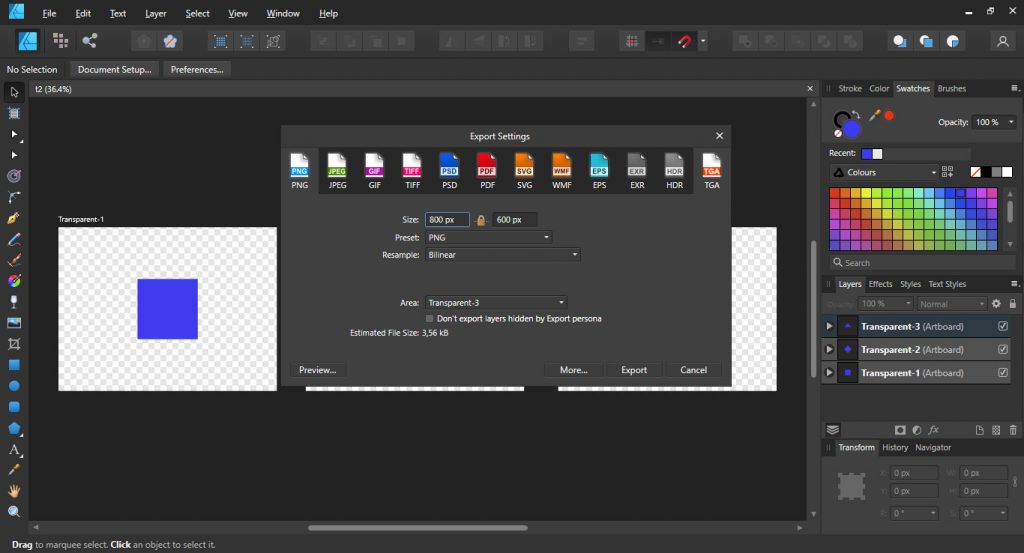
Step 3: Export Your Work
Now all you have to do now is export your design. Go to File > Export… or use the shortcut Alt+Shift +Ctrl +S on Windows and Opt+Shift+Cmd+S on Mac. When the Export Settings open, choose the right file extension that supports transparency. It can be .png, .svg, .gif, just to name a few.
How easy was that? A few clicks and you’re done!
If you want to see your artwork on a white background again, uncheck the selection box in the Color tab under the Document Setup window.
Ok, now that you know who to apply transparent background to your existing File, let’s see how you can set this option at the beginning of the working process.
Applying Transparent Background In The Affinity Designer From The Start
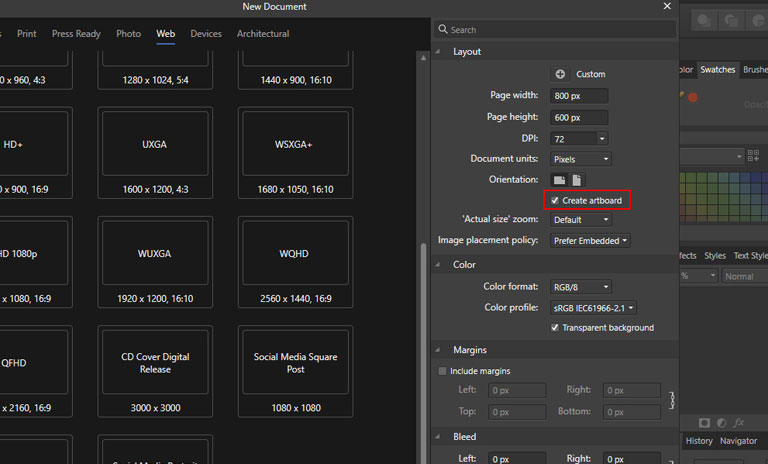
Step 1: Create New Document
To create a new document, go to File> New…, or use shortcut Ctrl+N or Cmd+N if you’re working on Apple.
When a pop-up window opens, you can choose among different Presents, depending on the type of work you’re going to do. So if you’re planning to create a design for the web or the print, the proper DPI, color space, and bleed will be already set for you. But no matter what preset you use, you can select the transparent background the same way.

Step 2: Choose Transparent Background
Navigate to the right side of the New Document window.
Under the Color tab, you can find the Transparent background option. Check the checkbox and inspect if all the other settings match the purpose of our project. Mind that you can always change the document settings under the Document Setup option.
Once you’re happy with everything, all you need to do is click Create.

Now you can start working on your designs without any background right from the start. As mentioned earlier, if you’d like to switch back to the solid background, you can go to Document Setup (shortcut: Ctrl+Shift+P or Shift+Cmd+P on Mac) and uncheck the Transparent background option under the Color tab.
Bonus Tip:
I prefer working with the created Artboard right from the get-go to apply a range of different properties to it. As a result, I thick the Create artboard checkbox in the Layout tab of the New document window.
How To Export Multiple Files With Transparent Background
If you have multiple transparent files ready to export, read on and find out the fastest way to do that.
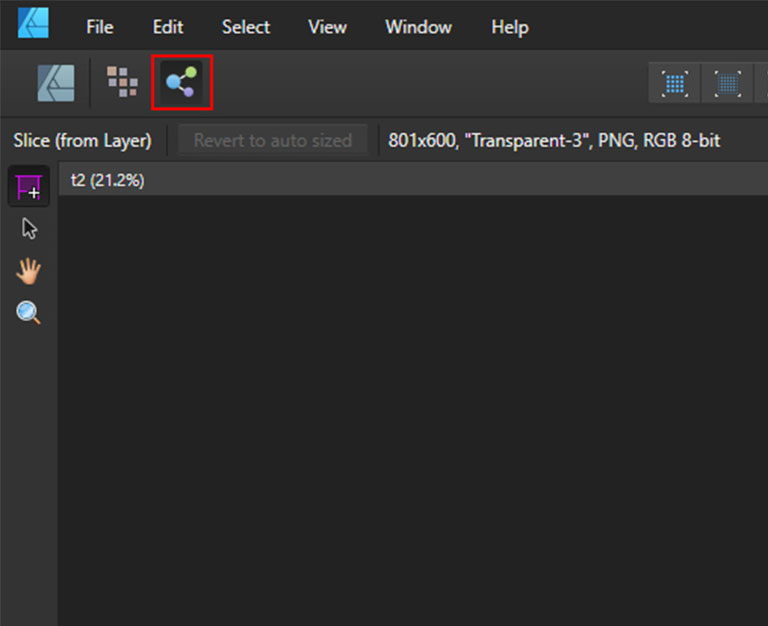
Step 1: Navigate To Export Persona
To export all the files at once, go to Export persona in the top left corner of the Affinity Designer window. It’s the most right icon of the three.
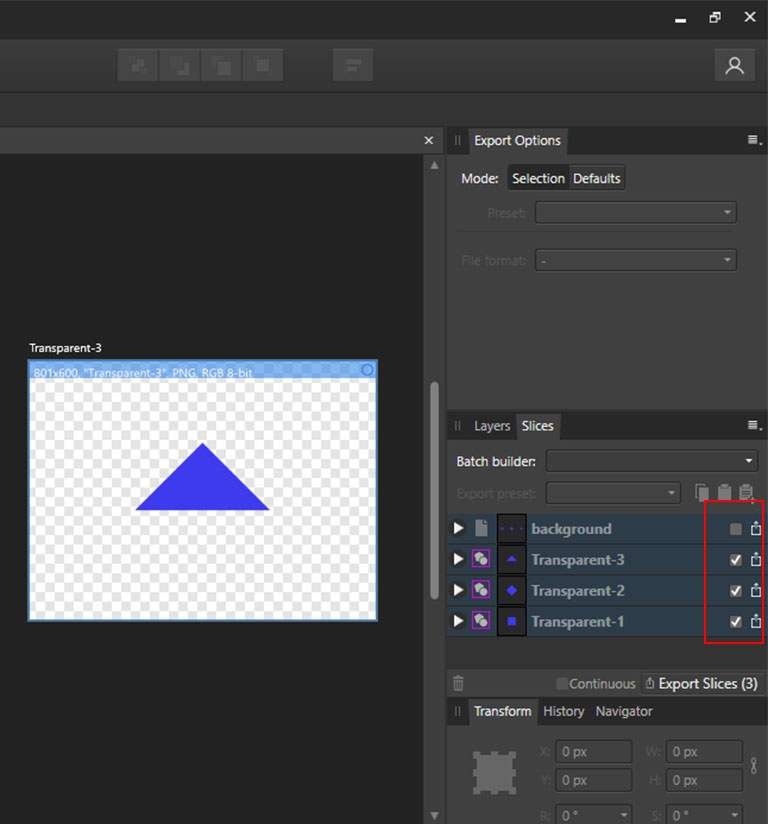
Step 2: Select The Slices You’d Like To Export
Select all the files you want to export. You can export all the files you’ve made, or you can mark the ones you’d like to. To select all the files, click the first one, hold the Shift key and select the last one. On the contrary, thick the Slices boxes you’d like to export.
The number next to the Export Slices button will indicate how many files you’re going to export.
You can apply the proper file format to the files you’ve selected. How to do that, you will find out in the next step.
When you’ve selected the files you want to export, be sure to choose the correct file format that supports transparency.
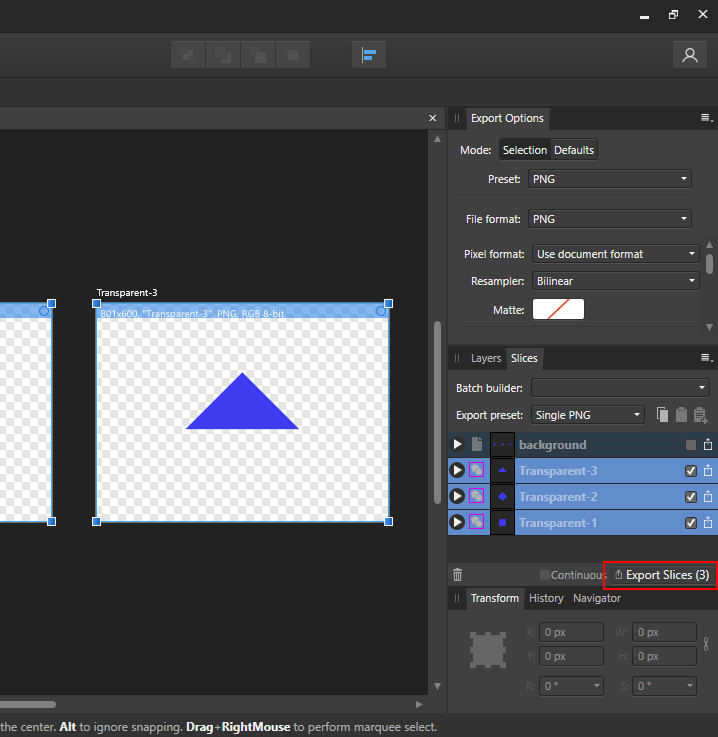
Step 3: Apply The Proper File Format To The Slice
Some of the most popular formats are PNG, GIF, BMP, TIFF, SVG. Most of the time, you’ll be exporting .png or .svg; that works great if you use them in the digital environment.
Like choosing the slices for export, you can also pick the format for all of them or apply a preferred format to a specific one.
However, in this case, selecting the files works a bit differently. To mark the ones you want to set the desired format, click on the space next to the name. As displayed in the image below.

Select the proper format under the Preset option in the Export options tab.

Step 4: Exporting Files
When you’re done with your selection, click the Export Slices button. Select the folder where you want them to be saved when the pop-up windows appear. Click Export, and you’re done.
Final Words
Suppose you’re used to the Adobe working environment. In that case, you can tell that the process of exploring a transparent background from Affinity Designer is a bit different. When using Adobe, you get to select the Transparent option when you’re saving the File. Still, in Affinity Designer, you have to set it beforehand. Therefore, it takes a bit of repetition to get it in your muscle memory, thus making it a bit annoying.
I hope this tutorial will help you be more stress-free while exporting designs with transparent background from Affinity Designer.
Till next time!